As I documented here, my last desktop PC build was in October of 2009. My original intention when I built that system was to eventually upgrade it to Windows 7. However, that upgrade path never materialized (as I have also bemoaned in a number of postings on this site), and so that PC is still running Windows XP. Fortunately, it’s running well and still has a good deal of life left in it, being built from solid mid-range components. I did slip in a CPU upgrade a while back, when the i7 960 CPU came down in price, and I was able to sell the 920 chip on eBay, so I got a 20% performance boost for about $170. Worth it.
But now that Windows 8 is now becoming mainstream, I decided I needed to get off the stick and get myself upgraded. Not to Windows 8. Good heavens, no. I never recommend a new Windows version until it’s been out for a solid year (and in the case of Vista, not even then). I’ve been using Windows 7 on my work laptop and on my living room media PC for long enough now that I’m comfortable making the move on my primary system.
If I wanted to upgrade Windows on my current system, my options were to wipe it and do a scratch Windows 7 install, or to perform a double upgrade (XP to Vista to Windows 7). Either way, my main system would be out of commission during the process, and when complete, I’d still be running on a three year-old PC. So I decided it was time to build a replacement desktop with Windows 7, and then take the time to migrate all my applications and data properly without the pressure of being without a working system. Plus the old PC would still have some resale value once I finished, which would offset part of the cost of new hardware.
I set myself a budget of $1000 for the build, which was doable since I planned to reuse a few components from my existing PC (monitor, keyboard, mouse, video and sound cards). At this price point, I could go for a few higher-end niceties as long as I stayed disciplined. I spent about three months evaluating products, and finally bought everything just before the holidays. Come along for the ride as I build this puppy.
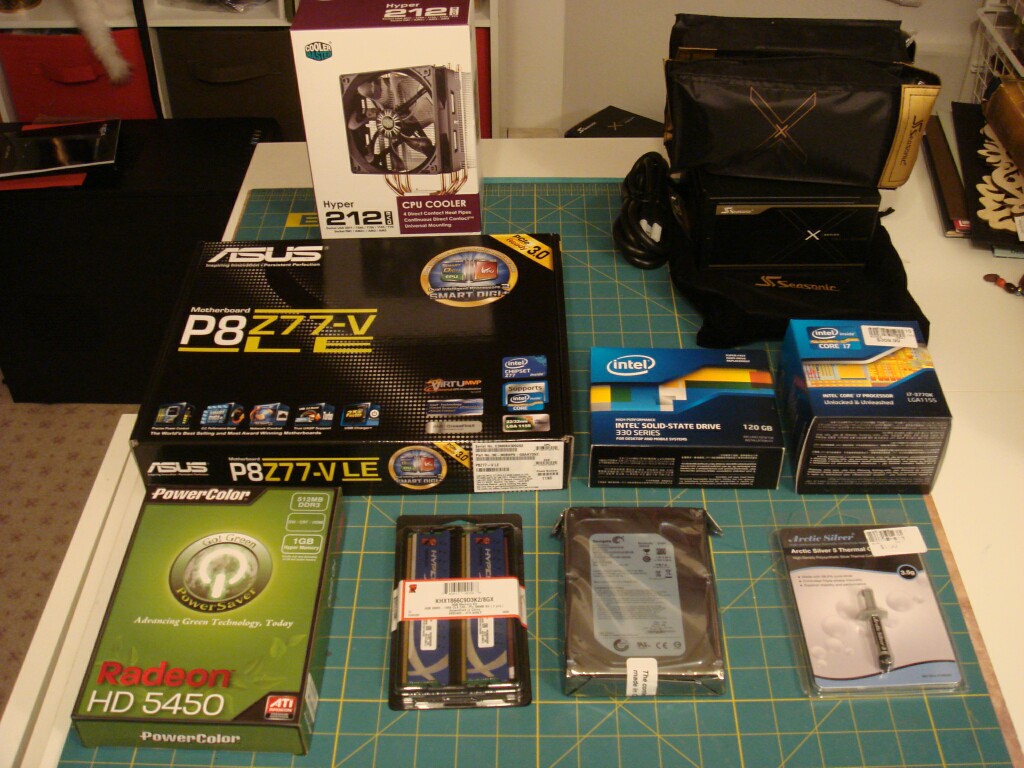
I chose to go with an Asus Z77 motherboard ($155) and Intel Core i7-3770K processor ($250 on sale). I could have gone cheaper on these, but I thought this was the place to put my extra dollars. The P8Z77-V LE motherboard is loaded with features, and the CPU is a 4-core Ivy Bridge model with an unlocked multiplier for easy overclocking (if I choose to do that in the future). The chip also has integrated graphics, but I prefer a discrete video card and will be reusing the AMD Radeon HD 5850 from my existing system. (The HD 5450 card pictured above is temporary and will be swapped with the 5850 later.)
We also have a Seasonic X-Series 750W power supply, a Cooler Master Hyper 212 Evo CPU cooler, 8GB of Kingston Hyper-X memory (also with headroom for overclocking), a 1.5TB Seagate Barracuda Green hard drive, and a 120GB Intel solid-state drive. SSD prices have finally started to come down below $1 per gigabyte, so I could afford to drop this in without blowing the budget. The motherboard supports Intel’s Smart Response, which uses the fast SSD as a buffer or cache drive for frequently-accessed files, speeding up disk I/O. It’s like a do-it-yourself hybrid drive, or what the marketing geniuses at Apple call “Fusion Drive.”

My apologies for most of these photos being out of focus. I thought the flash was too harsh and apparently didn’t have enough ambient light for the camera’s autofocus. (I also can’t see worth a damn any more and the photos looked fine on the camera’s viewfinder.) Here I’ve started to place components on the motherboard, starting with the CPU.

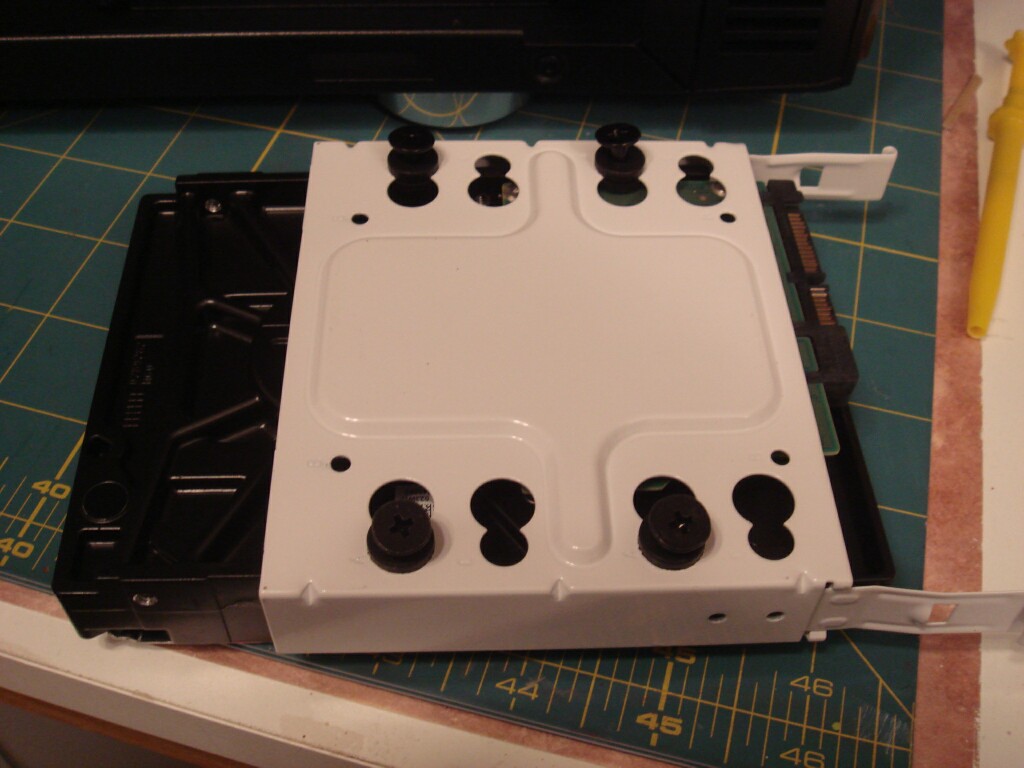
The CPU cooler is a huge heatsink and fan, as you’ll see below, so it requires additional support. This is the backplate to which the cooler assembly will be attached.

The Hyper 212 came with a tube of thermal grease, but I’d already bought this tube of Arctic Silver. It’s supposed to be the good stuff, so that’s what I used. Just a pea-sized drop, they say.
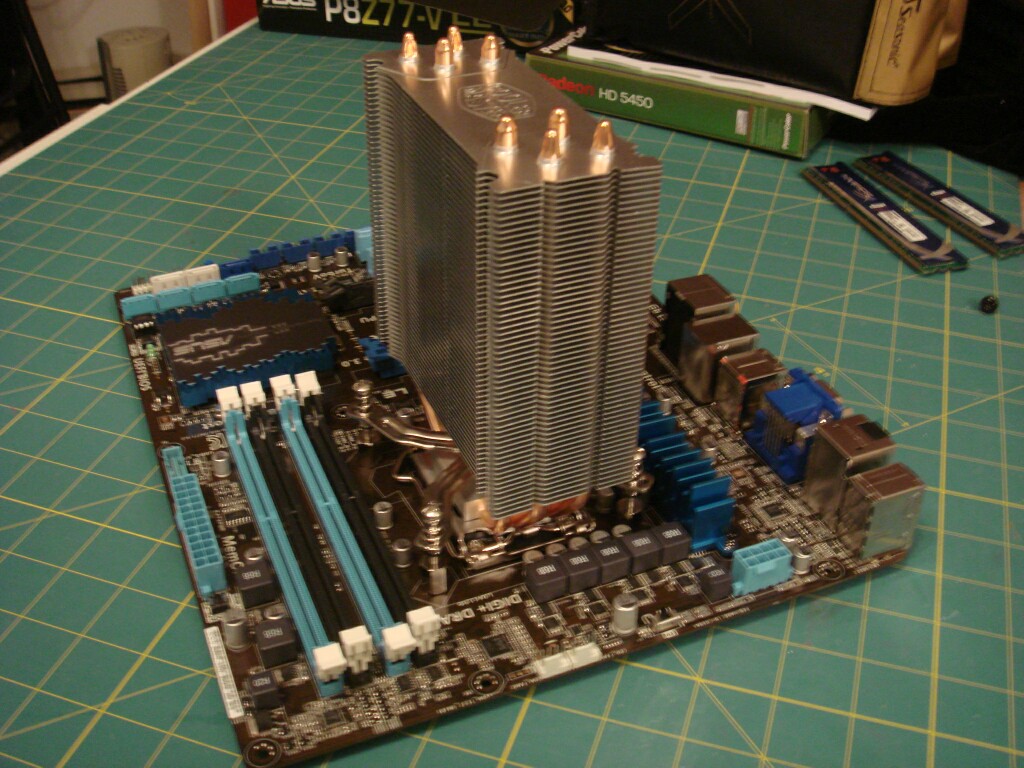
Here is the Hyper 212 heatsink mounted on the retaining bracket. The copper base rests directly on the CPU with the thermal compound in between. I’ve never installed one of these before and the instructions were awful. Thankfully, I found several helpful videos on the Internet to guide me. That didn’t stop me from originally mounting it facing sideways, which I didn’t realize until I had already installed the motherboard into the case. So I pulled it out and fixed it, then took corrected photos. I didn’t have to tell you that, but I’m honest to a fault.

Now I’ve attached the fan to the heatsink and placed the memory modules. The motherboard is ready to go into the case.

It took me forever to decide on a case. My main concern was that I wanted a quiet system, just like last time, since I do occasional audio recording with a live microphone and don’t want my PC’s fan noise interfering with that. Last time I used a Cooler Master Sileo case, but that model is no longer made. I settled on the Fractal Design Define R4 case shown. My concerns were that it only had two external drive bays and that the reviews said it was kind of big. It may be hard to tell from this photo, but it is definitely a big case, a couple of inches wider than your average mid-tower. However, it’s very well-built, and the extra interior room makes it easy to work in. Note the foam insulation on the front door. Both side panels are also covered in heavy sound-dampening material.

Here we are inside the case, with the side panels removed. Lots of internal drive bays, all with slide-out trays. The case comes with two large quiet fans (front bottom and rear top), and a built-in fan speed controller. The fans are big enough to push a lot of air and keep the case interior cool despite all the acoustic padding, and I could add additional fans if necessary. There are cutouts for mounting water-cooling, but I’m not that ambitious.
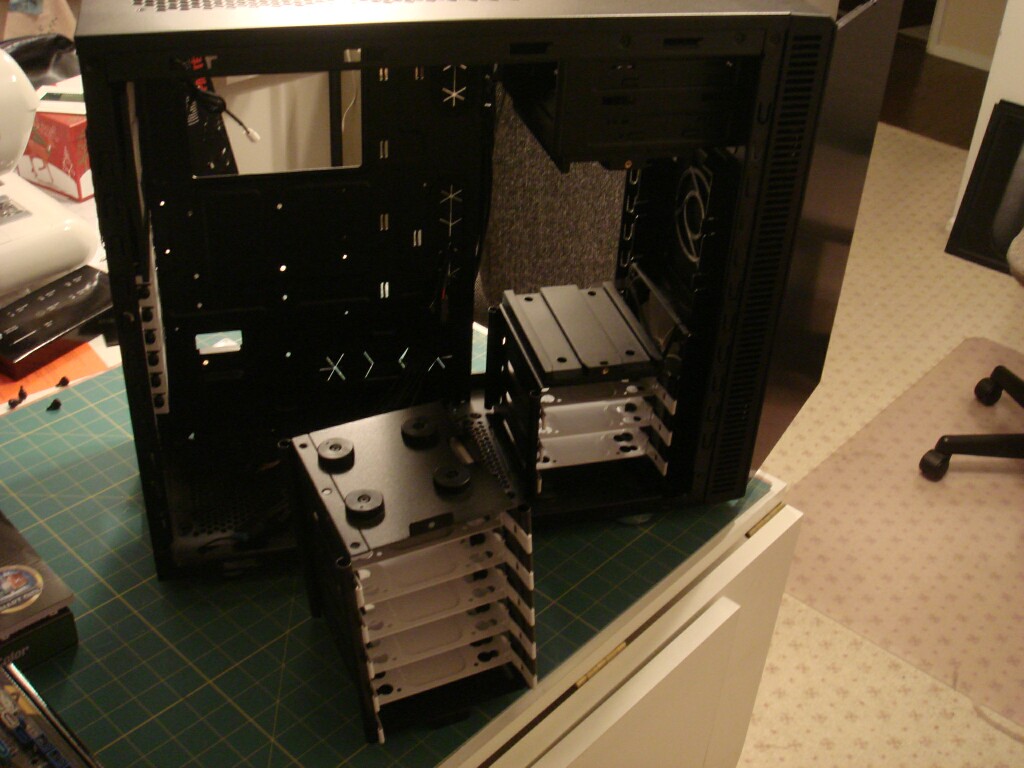
I discovered that the middle set of drive bays was removable, so I took it out. More room to work. I’ll only be using two of the bays anyway.

Here I’ve installed the I/O shield for the motherboard’s external connections, and attached the brass standoffs to the motherboard tray for mounting.

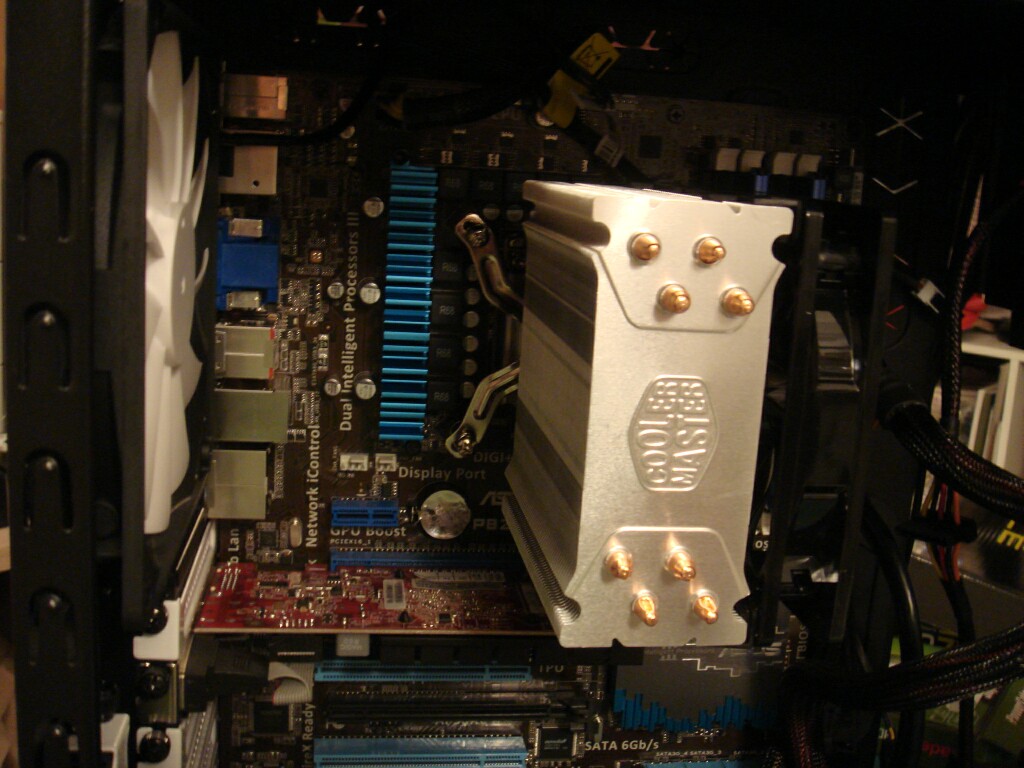
The motherboard is now mounted to the tray, using nine screws to secure it to the brass standoffs. Note how the CPU cooler fan is lined up with the case’s rear exhaust fan, as it should be, instead of pointing toward the bottom of the case as I had it originally. Duh.

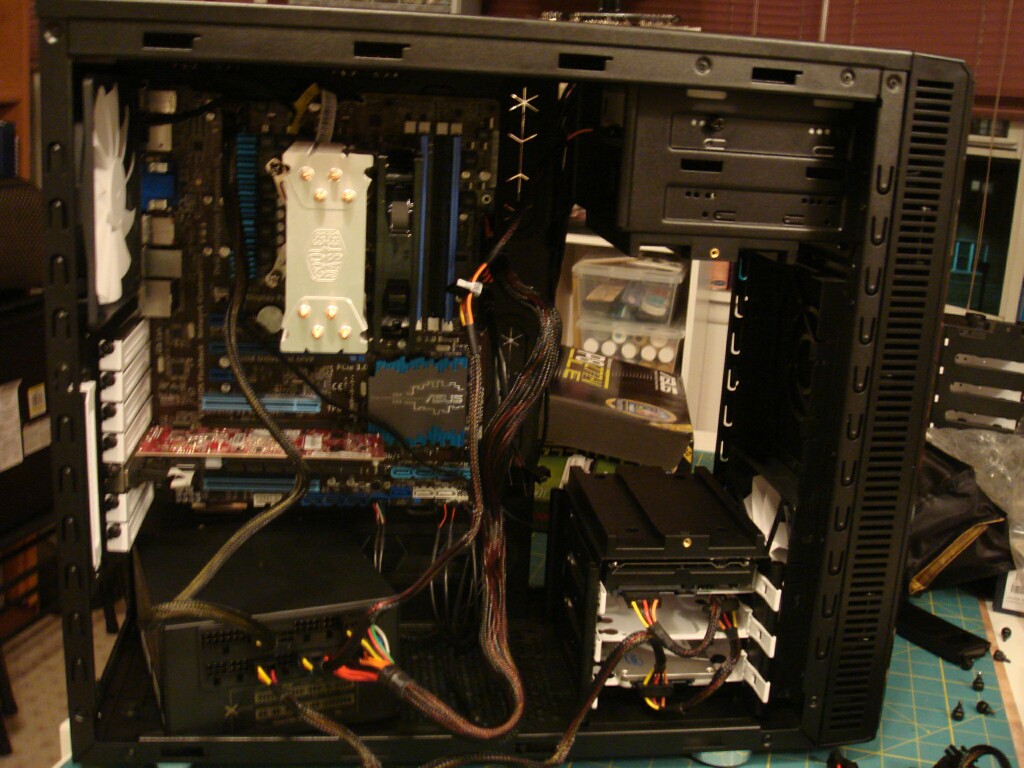
I’ve placed the video card in the PCI slot, and now I’m starting to attach the case leads to the motherboard. These are the wires that connect to the case’s USB ports, power and reset switches, and power LED. You can see a black cord running diagonally across the motherboard – this is the power connector for the front panel fan, which barely reaches. At this point I was opting to connect the fans to the motherboard rather than the case’s built-in fan controller. I thought I’d let the system BIOS control the fan speed rather than using the case controller to do it manually. I was forced to reconsider later.
I’m mounting the Seagate hard drive into one of the drive trays. The tray is fitted with rubber grommets, and Fractal provided anti-vibration screws for mounting. This is another nice “quiet” feature since hard drive vibration can be a source of additional noise. The “green” drives are also designed to conserve power and run quieter (at the expense of performance, which I’m hoping to compensate for with the SSD).

The hard drive is now installed in the drive bay with the SSD in the bottom bay. No special screws needed here. Flash memory doesn’t vibrate.

Now I have the optical drive installed in the top external bay. I was concerned about only having two external bays since I’m using four in my previous system, which has two optical drives, a card reader, and a USB hub. However, I realized that I never use the second DVD drive, and I don’t need more USB ports since this case has them built into the top panel. So I’ll move the card reader into the second bay when I’m ready to go live with this system. You might also make out the fan controller switch to the right of the optical drive. There are three speed settings.
Okay, now things are getting ugly as I start to connect the power leads. The Seasonic PSU is modular, so I only have to connect the leads I need, but that doesn’t mean that the inside of my PC will be neat and organized. I just don’t roll that way.

With the power connections all made, now I can screw the power supply into place. There is a rubber gasket between the PSU and the case, to absorb vibration from the power supply fan, so it takes a bit of elbow grease to get the screws in. The Seasonic is supposed to be very energy-efficient, and will even run fanless when the power load is low. I know 750W is overkill for this configuration, but experienced system builders will tell you to never cheap out on the power supply. You will usually regret it. And I could add a monster graphics card down the road, if I ever have time for serious gaming.
Another redo. There are two PCI Express slots and I realized the video card should be in the upper (blue) slot, which runs at a higher speed. This was impossible with that fan cable stretched across the motherboard, so once I moved the card, I connected the fans to the case fan controller instead, since the leads were easy to reach.
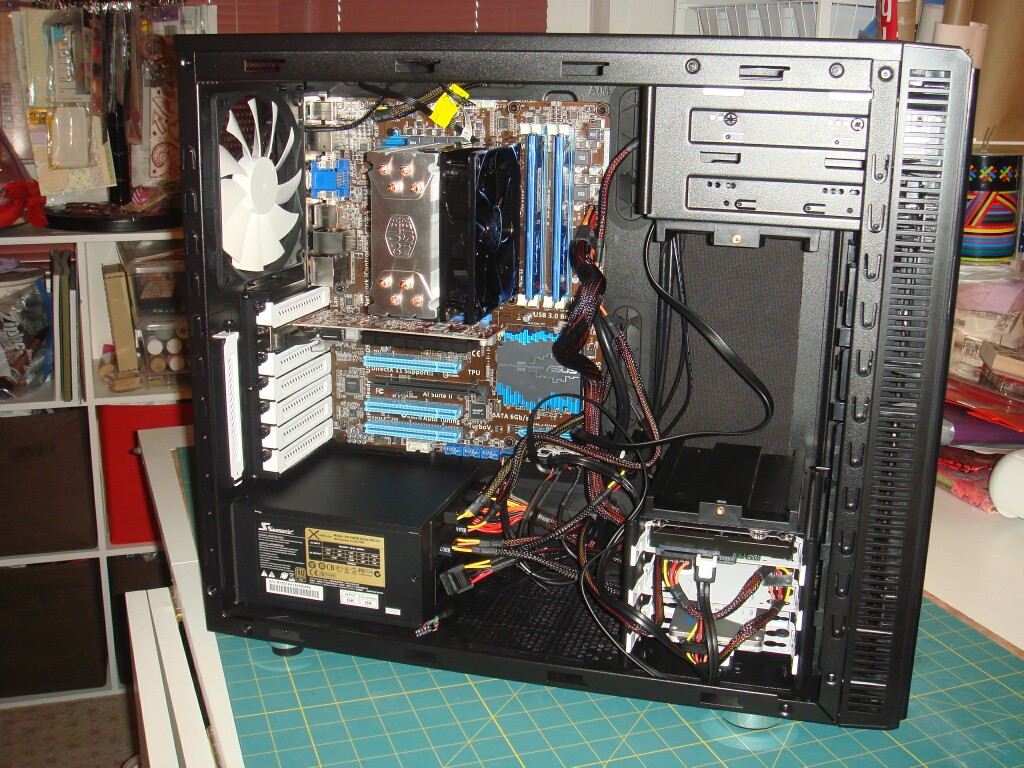
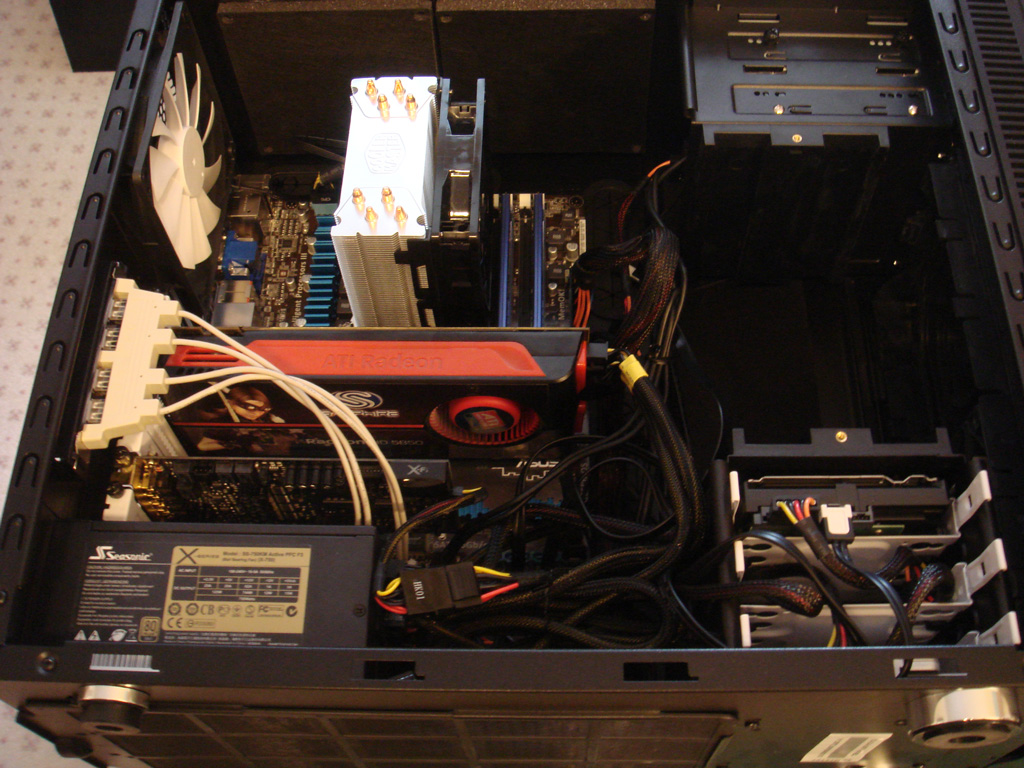
Here is the completed assembly after making the SATA cable connections to the drives. The R4 case has a lot of options for cable management, with pass-thru slots that can be used to route cables behind the motherboard tray and out of sight. But I found a far easier way to deal with unsightly cable clutter.

This is my solution. A nice, solid black side panel. No case window. Nothing to see here. Move along.
Amazingly, the system started up perfectly the first time I plugged it in. I don’t think I’ve ever had a build go that smoothly, and that’s even with my screw-ups on the CPU cooler and video card. I’ve had some builds that reduced me to tears and/or made me seriously question my career choices. But I think the time I spent on component selection paid off. I had a complete install of Windows 7 done in a couple of hours.
And now the hard work begins. I’ve got to compile a list of the applications and data I need to migrate over and get that process going, starting with low-priority stuff and finishing up with crucial daily-use stuff like Quicken and Outlook databases. As I’ve said here, I never wanted to start an installation over from square one, but I can’t deny the benefits of having a clean Windows install. I’d been having stability issues with my media center PC for months until I finally gave up and reinstalled Windows from scratch. And it’s been rock-solid since then.
It’s unfortunate that it takes such an investment of time and effort to get everything running optimally. I guess that’s why some people use Macs. But then they miss out on that feeling of accomplishment when it finally works right. At least that’s what I tell myself.